Almost One to One Online Digital Painting Training

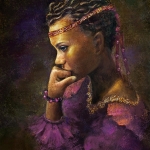
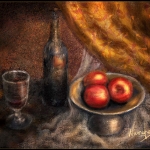
Personalized Digital Painting Workshop  – a training process which works quickly and effectively to get you painting, portrait or fine art, from a photo or from imagination.

I am throughly enjoying training students to begin or to enhance there ability to paint  digitally – “Almost One to One”. I find that students feel comfortable to ask questions without embarrassment and to pursue  knowledge from “just where they are” in this very private and personal workshop environment.

Training and attention is very specific to your individual needs. I work with not more more than 3 students at a time and at times ” one to one” – privately.  I am currently working with an interesting lady in Pennsylvania. She has been a traditional painter for 20 years or so and has even written and published a book on traditional painting. She is not a photographer, which is the path of so many into digital painting. She wanted to expand her capacity to include digital painting. She searched the internet and decided that my training approach and my painting style was what she was looking for.

She purchased the 30 hour training package. She does not own Photoshop, had not yet installed Painter on her computer is a bit uncertain about her computer skills in general.  We got her all set up with Painter 12 and its updates. She purchased her Intuos 5 and we were ready to begin our GotoMeeting sessions.

Our first session was 3.5 hours.   I believe that working in short sessions prevents burnout when consuming lots of new technical information while at the same time allows sufficient time to synthesize it.   I gave her several  assignment after her first session.  We would not be able to meet for another full week, because of her schedule – which is unusual. Normally we meet 2 to 3 times per week. I decided I wanted to reconnect with her later, the evening of  her first training day after she had time to work on her assignment. I wanted to make sure she understood enough to do her assignments in order not to have unanswered questions for a full week. To my delight, she had completed her first assignment which included, painting using different paper textures, using patterns, using a variety of brush stokes and working on layers. WOW!! She was proud and so was I.

We can schedule sessions to fit your schedule.  Please call me at 360.779.1375 for additional information. Also visit my STORE for workshop options and prices.   New workshops are scheduled nearly every month.


Related Images:

Conceptualizing a Painting from a Photo

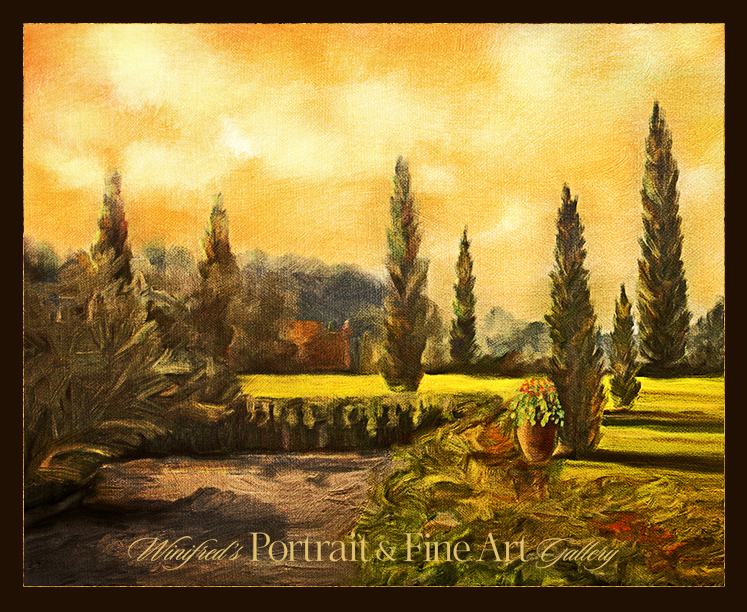
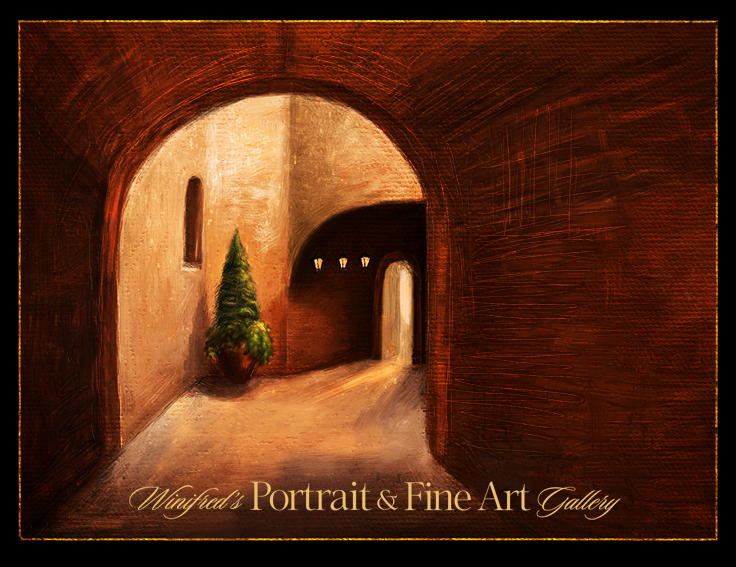
This painting was created in Photoshop CS6, but this post is not about how to paint or use mixer brushes in Photoshop. I will begin the create these tutorials soon. Equally important to how to paint is conceptualizing and developing the structure and content of a painting.

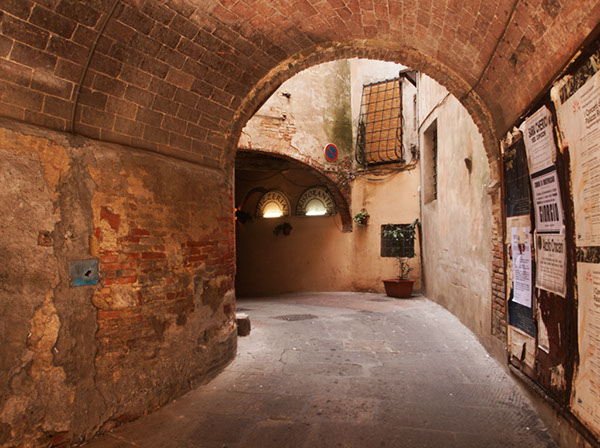
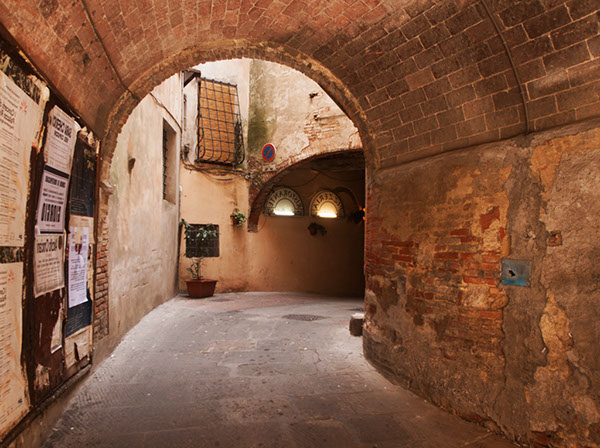
Recently, I painted an scene I photographed in Italy.  I chose it as  the inspiration of my painting because of it’s  depth, composition, and light. it was not important to me to  reflect the realism of the photo thought I would retain of it;s structure. The first thing I did was to flip the image horizontally a visual check I always perform  I preferred it.  I then eradicated most of the image detail before beginning to express my vision to be contained within the shape and  form.

The following reflect some of the stages of the painting – perhaps too many.

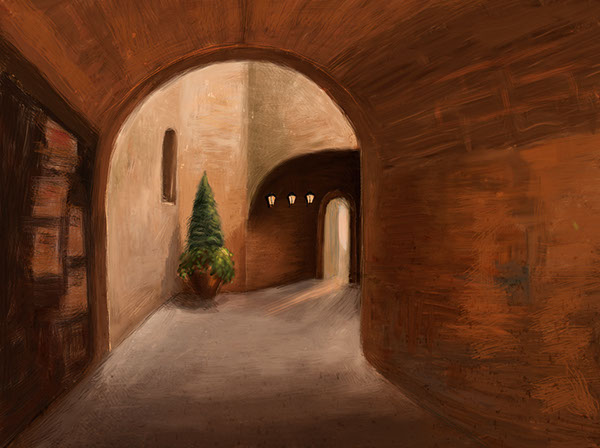
My first consideration was  lines and composition of the reference image.

I flipped the image. The composition was strong in both directions, however, I felt this flipped version read a  little stronger. This  would be the version of the image I would work with.

I  reduced and simplified the elements on my canvas. I liked the complete simplicity of this form.


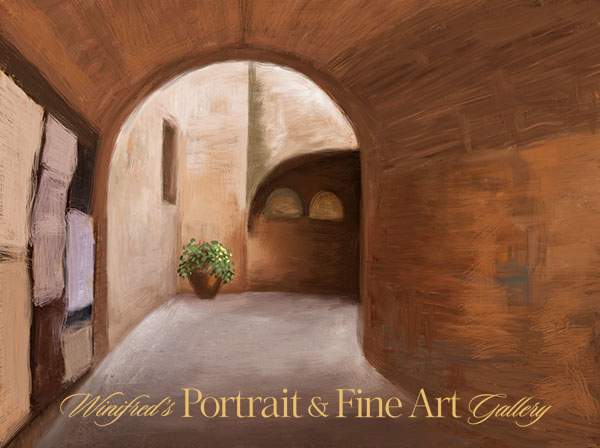
I  began to add in elements. I painted a pot and planter in the corner.  This seemed to work.

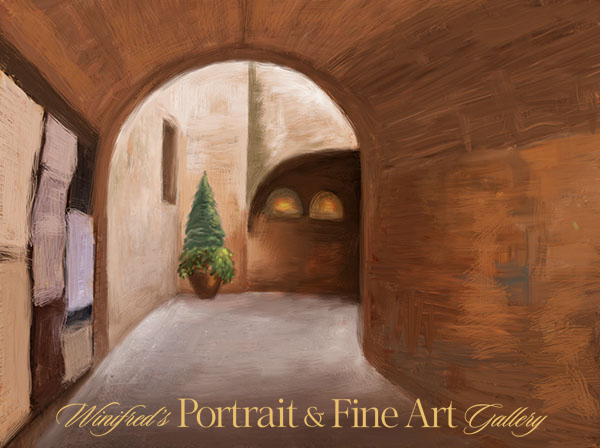
I decided a taller more structural plant would be a better choice.  I thought of the Italian Cypress.  The large light forms, earlier Pizzeria lights shapes were not working,

Below, I removed all light from the wall.

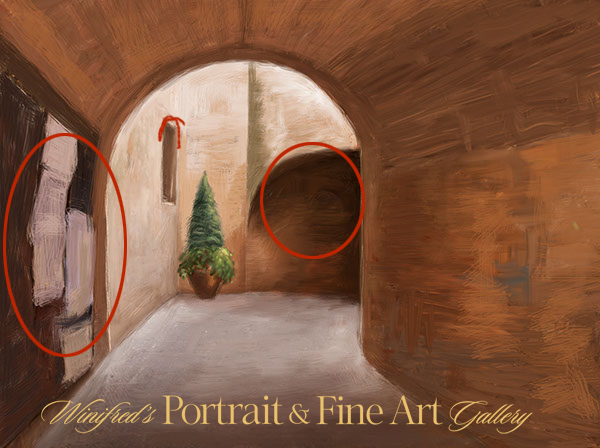
I simplified the “message board” on the near left, I thought this high contrast area still called too much attention to itself. It held my focus, rather than allowing my focus to  easily move beyond it.

Once visually within the space and the light, the darker area, just off center, stopped the flow too abruptly. This would need to be resolved.

I painted out part of the signage elements front left, attempting to lessen the  visual impact of this area.

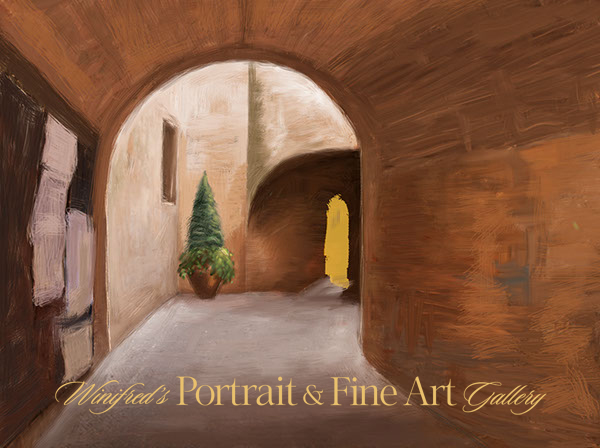
I  “cut” an opening into the far dark wall to create a doorway. It created more light, focus and depth.
 

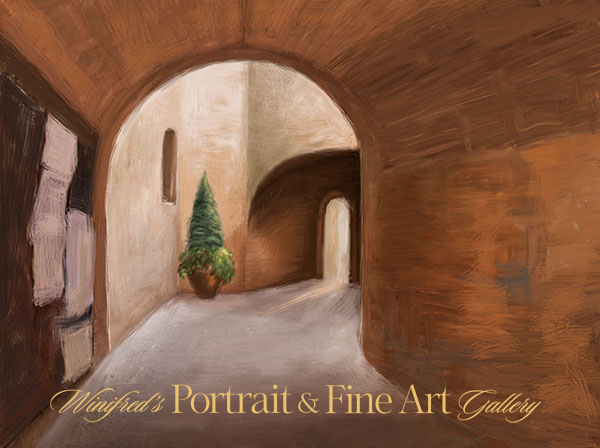
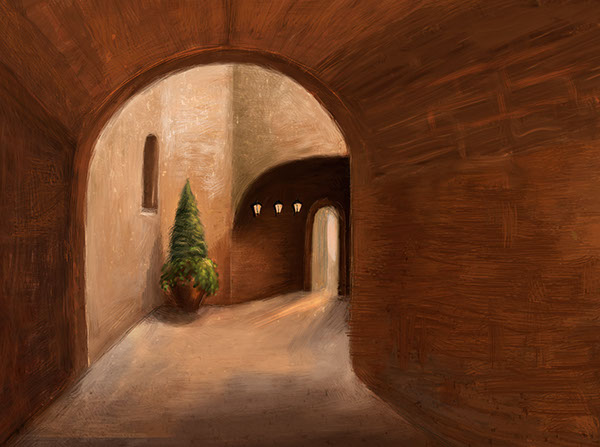
Extending  a light beam from the open door brought that area to life. The rectangular window shape was changed to an arch.


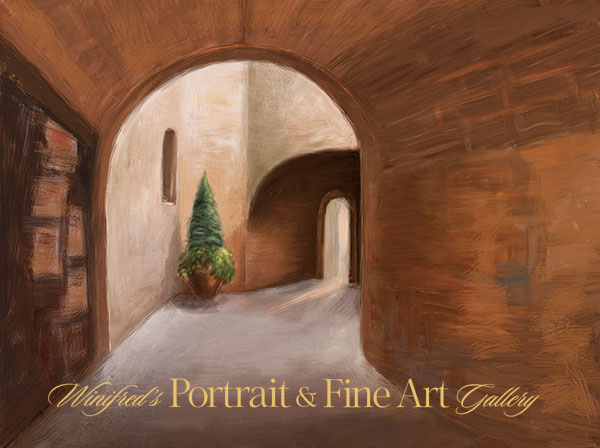
I darkened and subdued the signage further ( front left). I like the look of it and shadows were painted behind the planter.

I painted small lanterns on the wall, darkened and warmed the light tones of the light in the room. I actually like this version quite a lot. (Above) Ultimately, I painted away all of the signage,  and cropped part of the left side of the painting. I painted in additional light on the floor reflecting  light spill.  I was torn  about doing this – and I like this version as well. The cropped version is simple and quiet.Using the overlay blend mode, to deepened the tones and contrast, I applied a canvas texture and painted it in selectively using a layer mask. I added additional brushstrokes using a bevel and emboss layer style.  It is complete – for the moment, Thank you

To view a collection of my paintings created in Photoshop – CLICK HERE

Related Images:

Winifred’s Almost One To One Online Painting Workshops

Winifred’s Almost One To One Online Painter Workshops 

Winifred Whitfield has just announced her Almost One To One Online Digital Painting Workshops geared to the beginner and intermediate digital painter.  Content is primarily Corel Painter based but some beginner Photoshop painting discussions and demos MAY be included. There is a workshop currently in progress but workshops commence monthly. Since workshops are very small 2 to 5 people, register soon to ensure your place and to take advantage of the introductory offer.

CLICK HERE to View WORKSHOP DETAILS HERE


Benefit to you

~ Take your painting to a new level. Have you stopped seeing progress? Are you not creating what you want? Do you wish to become more expressive in your painting?

~ You will become more confident as a painter and will create expressive  paintings, which look like paintings, and not smeared  or blurred photos. ( You know what I mean) You will begin to create Painterly looking paintings as you envision them.

~ There will be a series of seven 2  to 3 hour  online sessions  which take place 2 to 3 times per week, totaling not more than 15 hours in live GotoMeeting online session time. Groups will be very small – only 2 to 5 people,  for maximum personalized attention.

~ We work hard but we laugh also. You will NEVER be harshly judged or attacked. I am your greatest fan!  I KNOW that together we can accomplish your objectives .

~  You will complete your  assignments on your  on time,  rather that using your workshop hours – virtually doubling or tripling the value of an in person workshop.

~ You don’t have to remember it all. You will receive a video of  a  demo that I do for you in each session.

~ Small groups will be formed matching skill and interest levels.

Includes 2 tutorials from Website Store –  which I will choose for you to support your  practice or for inspiration (approximately 140.00 value) FREE,

~ Other Free products  will be included.

~ One group make up session  –  in case a session must be missed.

Some beginner Photoshop painting is included.


Please be sure to VIEW MY FINE ART GALLERY

 New workshops will be starting monthly but register and purchase now to receive the current introductory offer.

Please Contact Me  –  including your PHONE NUMBER if you would like to receive additional information.  It will be emailed to you immediately. I will  also request information and images from you so that I can carefully match your experience level within a small group. Look forward to a personalized, learning filled and wonderful experience.


Related Images:

Winifred Whitfield’s Portrait Tutorial Store Now Open

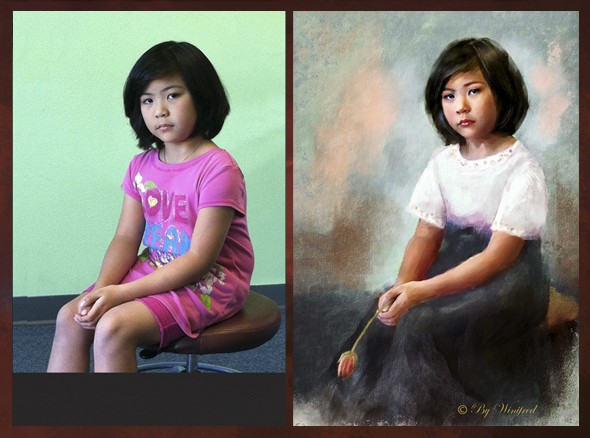
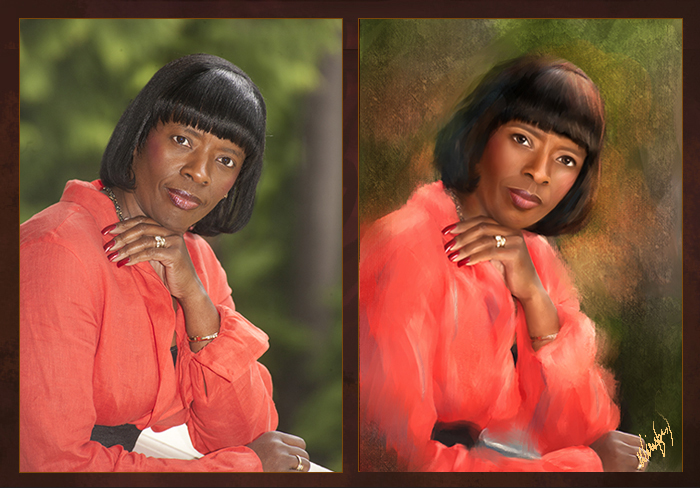
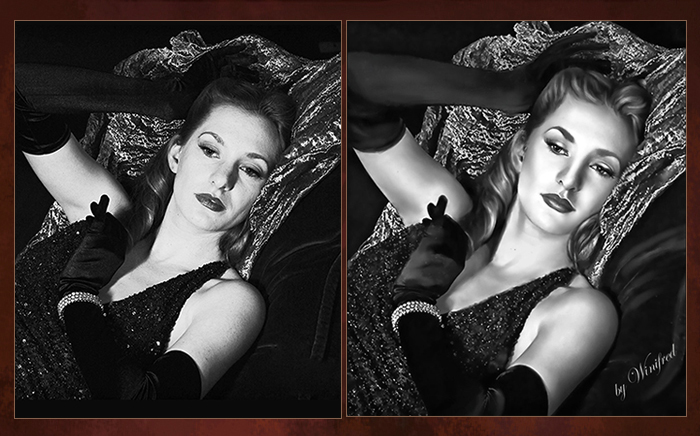
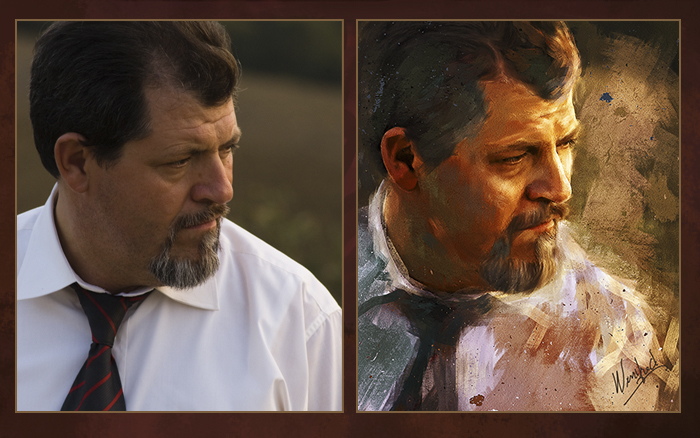
Winifred Whitfield trains digital portrait painters. Winifred’s Portrait Tutorial Store offers a collection of portrait painting tutorials for all painting levels, which can be purchased  and downloaded immediately from the store, individually or in multiples. The collection as of this date, includes 10  tutorials –  approximately 1 to 2.5 hours in length, which includes the painting of women, glamour, children, portrait fine art, and a man.

Please Visit Our Store

Ethnicity varies amongst the portrait paintings.  You will not be disappointed in the range of tutorial choices available to you. Short Video Previews are also available on the STORE page and Winifred is personally abailable to assist you in making the choice/s right for you. In addition there are many freebies –  gifts to you!  Please visit soon.

***(In the firefox browser, there appears to be a problem in accessing the product page.  Please choose an alternate browser if possible).

Tutorial Examples:


  Girl in White


Girl with Flower 

Lady in Red 

Creating Hollywood Glamour 

Man in White Shirt 

Corel Painter Training

In addition, there are about 10 viewer favorite Corel Painter 12.2  tutorials youtube videos now on the site from My Youtube Channel – where there are now more than 30 tutorials.

Please be sure to take advantage of these resources.

Related Images:

Corel Painter 12.1 – Fun Painting

I thought I would try something different.  I am a huge fan of playing and experimenting.  To do so even with the “camera running” is even a greater challenge.  This is painting from imagination, just quickly putting the brush down as the image comes to mind.  If course the video speed was increased fur entertainment value.  I hope you enjoy. Winifred

Related Images:

Corel Painter 12.1 GRADIENTS

All About Gradients

This week, I posted a video about ways to create and use Gradients in Corel Painter 12.1.  I often use gradients in painter.  Filling  a canvas with a gradient or using it as an overlay  is a good way to quickly get some color on your canvas and often sparks the next creative idea.

In this video, you will learn how to create a two-point gradient and how to save it, how to create a custom color gradient from a strip, (1000 pixels wide by 50 pixels deep), save it and capture the icon, and how to create your own gradient library.  To add additional gradient  collections to your libraries, please to to Corel Painters “extra content” page or click on the direct link  to the extra content on my RESOURCES blog page. I hope you enjoy this video. Winifred.

Related Images:

Corel Painter Tutorial 12.1 – Selections and Textures

The purpose of this Tutorial is to build experience in in visualizing a non photographic image,  making complex selections,  and making decisions about color texture which will affect the design and creativity of your painting. Any brush which has  “grain” in it’s name can be used.  I used the soft pastel.  With pastel and chalk brushes a grain setting of 7% gives the maximin grain.  Taking the grain setting to 100 percent pretty much allows you to paint without grain.  This is a fun way to create a painting and a good way to  experiment with creating a painting without cloning from a photo. Just play and enjoy.


Related Images:

Winifred Whitfield Turns Photographs to Paintings

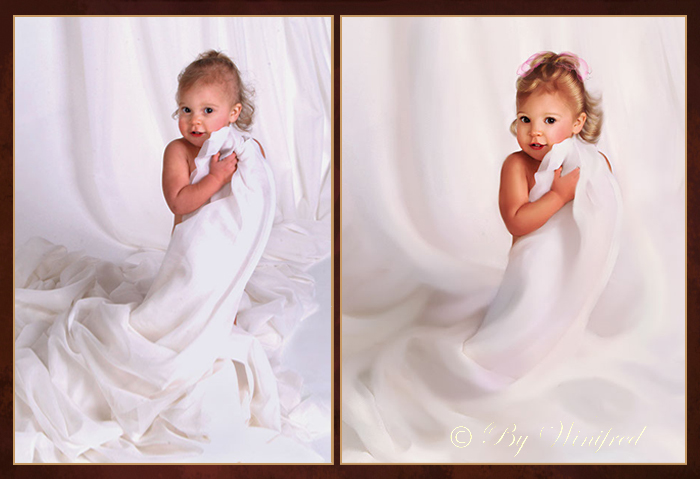
Photographs often serve as my inspiration, but I love creating portrait and fine art paintings. Whether the photograph is taped on on a wall to view or exist as an underlying layer in Corel Painter, my mission is to go beyond – far  beyond the photograph which inspires me to create a painting.

The following image progression represents just such a process.  I wish I could say that when I started to paint  I know where I am  going – that I have envisioned the final painting.  The fact is that  is rarely the case.  My paintings are created one brushstroke or one vision at a time ,as in – just keep putting one foot in front the other.  I just follow inner vision. Often I close my eyes to envision the  that next step and it always comes.  For sure, nothing will happen if one does not start. So, I support you in starting, in experimenting, in playing.  I paint everyday because I love it. I learn something new everyday.

The following image progression represents one such artistic journey for me:

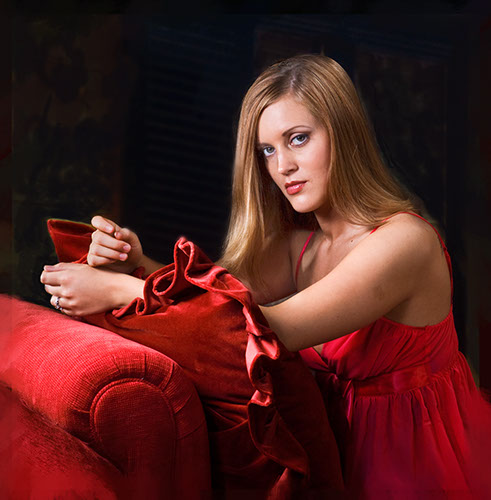
Reference image – a boudoir portrait. I knew I wanted to subdue the colors

and to soften and paint all with brushstrokes and to darken her

bright sparkling eyes, to remove photographic detail.

I  changed the color pallet of the image before creating a
clone with painterly  brush strokes.

Now I was on my on and  I would paint the remainder from imagination.
I felt she needed a hat and I painted one.

I started to envision details – like flowers on her hat.

A color scheme continued to emerge.  I was not happy with the hands

in the original image  – not for hands in a classic portrait.

I painted a hand thinking of the grace and stylized long tapered

fingers seen in classic portraiture.

This is the final painting, its character, visual and emotional

content has been altered and it is sensuous in a different way.


Related Images:

Corel Painter 12.1 – All About Color Sets

Use color sets to select a single color or select all the colors in a color set to paint with. Create custom color sets, add new color sets fron Corel Painter Extra Content. Modify a  color set. Add or delete from view color sets.  This video will show you how.

I created a custom color set in order to select colors for this painting.

Related Images:

Corel Painter 12.1 Tutorial – Creating Multi Color Brush Strokes

Multi color brush strokes add to the richness of this painting.

Create multiple colors in your brush strokes by:

1) varying hue, saturation and value (HSV),

2) select color from a gradient or,

3) select color from an entire color set.

I am sure you will  enjoy creating more colorful and expressive brush strokes.  The set of brushes I referred to are called Desert Oasis.  They are watercolor brushes and would have to be converted to “cover” if they are to be used as a non watercolor variant. They can be found at Skip Allen Paints Blog along with many other brush sets he makes available for free.

Related Images: