Conceptualizing a Painting from a Photo

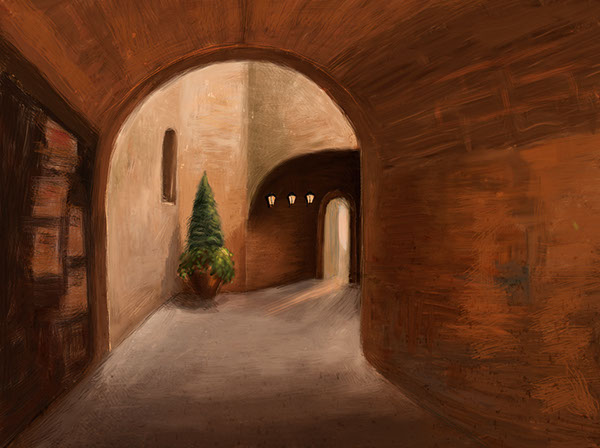
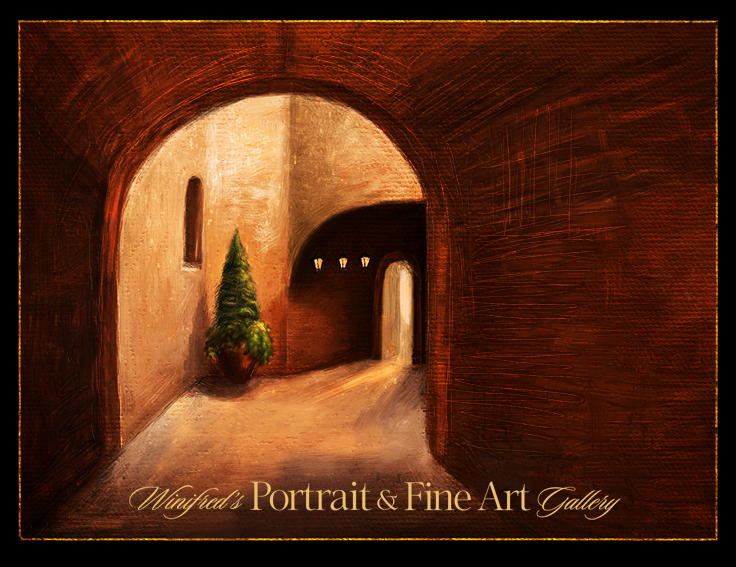
This painting was created in Photoshop CS6, but this post is not about how to paint or use mixer brushes in Photoshop. I will begin the create these tutorials soon. Equally important to how to paint is conceptualizing and developing the structure and content of a painting.

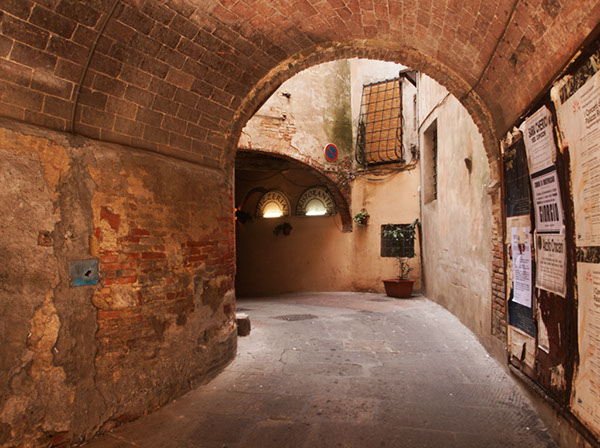
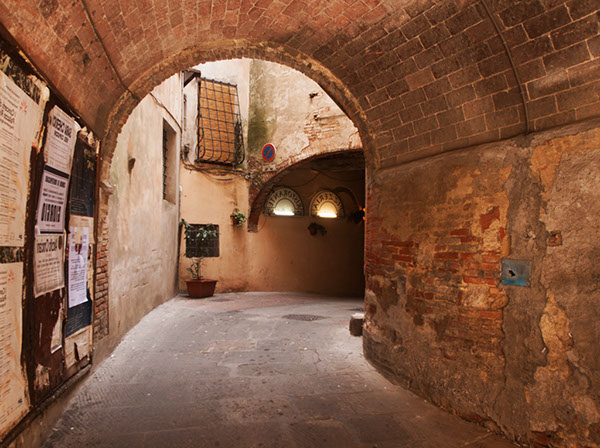
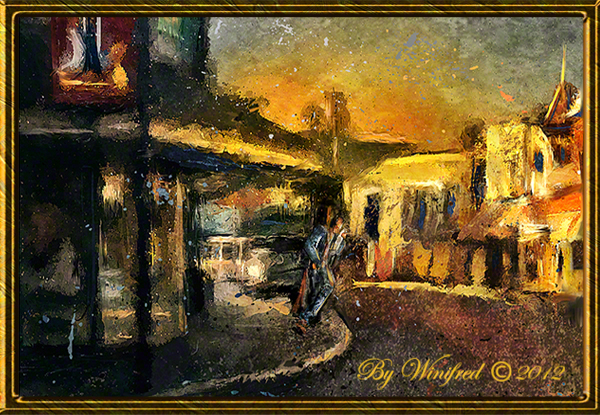
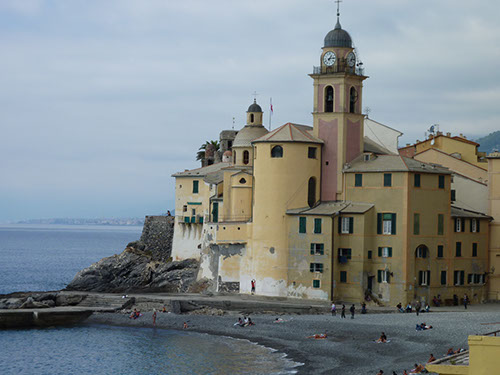
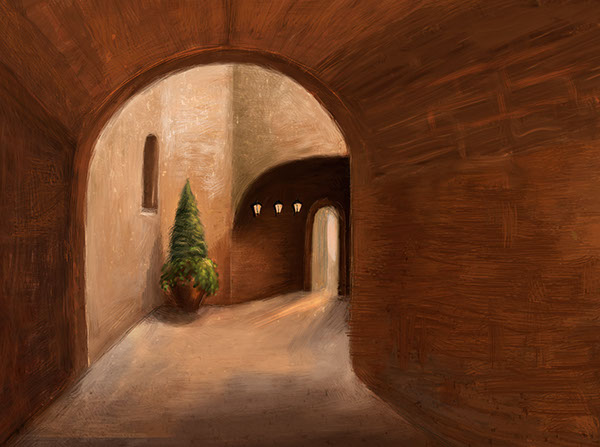
Recently, I painted an scene I photographed in Italy.  I chose it as  the inspiration of my painting because of it’s  depth, composition, and light. it was not important to me to  reflect the realism of the photo thought I would retain of it;s structure. The first thing I did was to flip the image horizontally a visual check I always perform  I preferred it.  I then eradicated most of the image detail before beginning to express my vision to be contained within the shape and  form.

The following reflect some of the stages of the painting – perhaps too many.

My first consideration was  lines and composition of the reference image.

I flipped the image. The composition was strong in both directions, however, I felt this flipped version read a  little stronger. This  would be the version of the image I would work with.

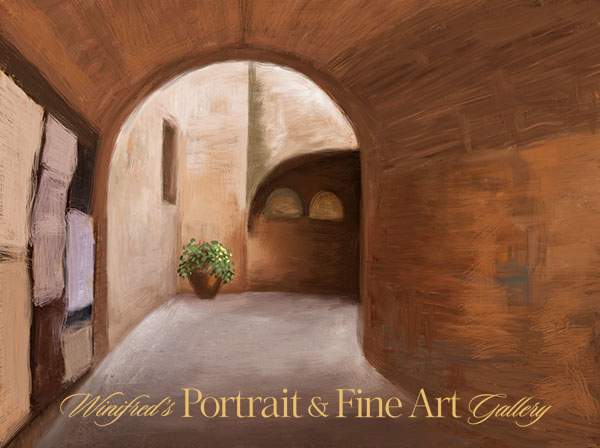
I  reduced and simplified the elements on my canvas. I liked the complete simplicity of this form.


I  began to add in elements. I painted a pot and planter in the corner.  This seemed to work.

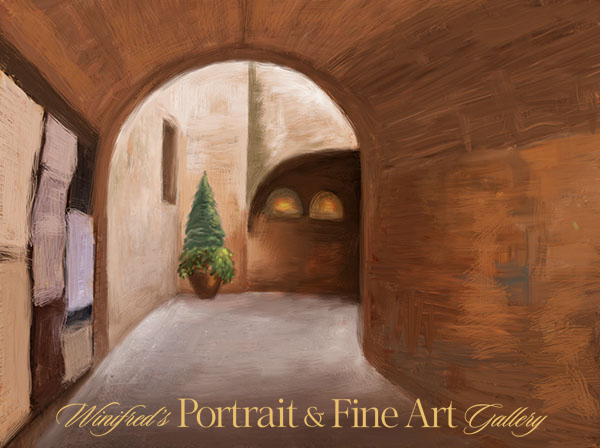
I decided a taller more structural plant would be a better choice.  I thought of the Italian Cypress.  The large light forms, earlier Pizzeria lights shapes were not working,

Below, I removed all light from the wall.

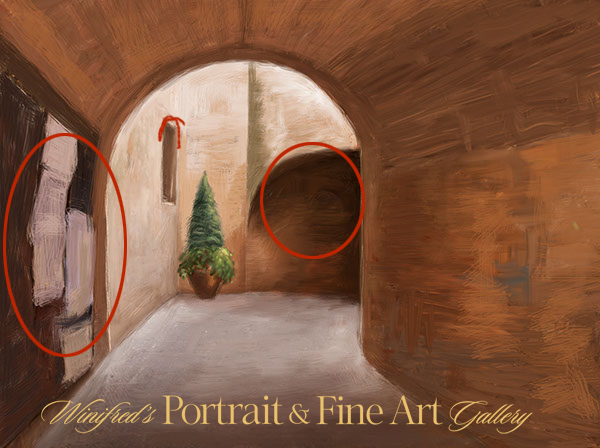
I simplified the “message board” on the near left, I thought this high contrast area still called too much attention to itself. It held my focus, rather than allowing my focus to  easily move beyond it.

Once visually within the space and the light, the darker area, just off center, stopped the flow too abruptly. This would need to be resolved.

I painted out part of the signage elements front left, attempting to lessen the  visual impact of this area.

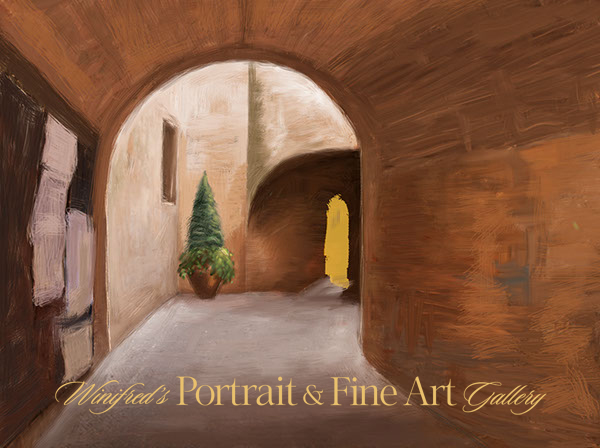
I  “cut” an opening into the far dark wall to create a doorway. It created more light, focus and depth.


Extending  a light beam from the open door brought that area to life. The rectangular window shape was changed to an arch.


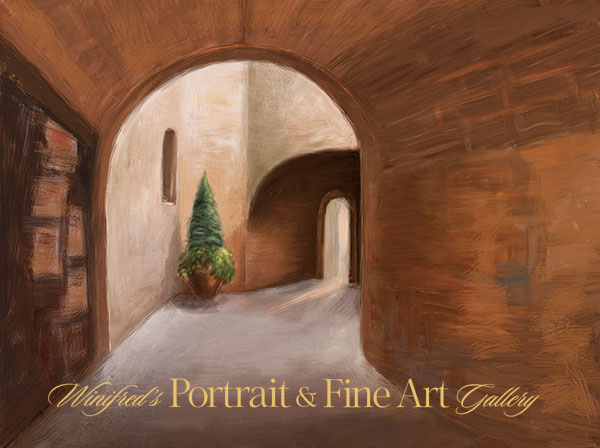
I darkened and subdued the signage further ( front left). I like the look of it and shadows were painted behind the planter.

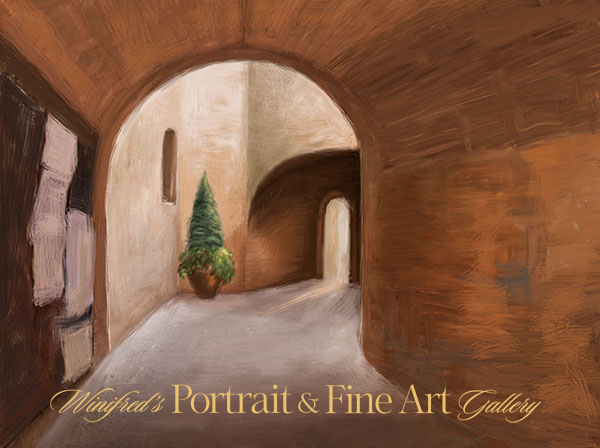
I painted small lanterns on the wall, darkened and warmed the light tones of the light in the room. I actually like this version quite a lot. (Above) Ultimately, I painted away all of the signage,  and cropped part of the left side of the painting. I painted in additional light on the floor reflecting  light spill.  I was torn  about doing this – and I like this version as well. The cropped version is simple and quiet.Using the overlay blend mode, to deepened the tones and contrast, I applied a canvas texture and painted it in selectively using a layer mask. I added additional brushstrokes using a bevel and emboss layer style.  It is complete – for the moment, Thank you
To view a collection of my paintings created in Photoshop – CLICK HERE

Related Images:

Winifred’s Almost One To One Online Painting Workshops

Winifred’s Almost One To One Online Painter Workshops 

Winifred Whitfield has just announced her Almost One To One Online Digital Painting Workshops geared to the beginner and intermediate digital painter.  Content is primarily Corel Painter based but some beginner Photoshop painting discussions and demos MAY be included. There is a workshop currently in progress but workshops commence monthly. Since workshops are very small 2 to 5 people, register soon to ensure your place and to take advantage of the introductory offer.

CLICK HERE to View WORKSHOP DETAILS HERE
 

Benefit to you

~ Take your painting to a new level. Have you stopped seeing progress? Are you not creating what you want? Do you wish to become more expressive in your painting?

~ You will become more confident as a painter and will create expressive  paintings, which look like paintings, and not smeared  or blurred photos. ( You know what I mean) You will begin to create Painterly looking paintings as you envision them.

~ There will be a series of seven 2  to 3 hour  online sessions  which take place 2 to 3 times per week, totaling not more than 15 hours in live GotoMeeting online session time. Groups will be very small – only 2 to 5 people,  for maximum personalized attention.

~ We work hard but we laugh also. You will NEVER be harshly judged or attacked. I am your greatest fan!  I KNOW that together we can accomplish your objectives .

~  You will complete your  assignments on your  on time,  rather that using your workshop hours – virtually doubling or tripling the value of an in person workshop.

~ You don’t have to remember it all. You will receive a video of  a  demo that I do for you in each session.

~ Small groups will be formed matching skill and interest levels.

Includes 2 tutorials from Website Store –  which I will choose for you to support your  practice or for inspiration (approximately 140.00 value) FREE,

~ Other Free products  will be included.

~ One group make up session  –  in case a session must be missed.

Some beginner Photoshop painting is included.


Please be sure to VIEW MY FINE ART GALLERY

 New workshops will be starting monthly but register and purchase now to receive the current introductory offer.

Please Contact Me  –  including your PHONE NUMBER if you would like to receive additional information.  It will be emailed to you immediately. I will  also request information and images from you so that I can carefully match your experience level within a small group. Look forward to a personalized, learning filled and wonderful experience.


Related Images:

Corel Painter 12.1 – Fun Painting

http://www.youtube.com/watch?v=9dXZCfwG_UY&feature=plcp

I thought I would try something different.  I am a huge fan of playing and experimenting.  To do so even with the “camera running” is even a greater challenge.  This is painting from imagination, just quickly putting the brush down as the image comes to mind.  If course the video speed was increased fur entertainment value.  I hope you enjoy. Winifred

Related Images:

Corel Painter Tutorial 12.1 – Selections and Textures

http://www.youtube.com/watch?v=hTAGYajByvQ

The purpose of this Tutorial is to build experience in in visualizing a non photographic image,  making complex selections,  and making decisions about color texture which will affect the design and creativity of your painting. Any brush which has  “grain” in it’s name can be used.  I used the soft pastel.  With pastel and chalk brushes a grain setting of 7% gives the maximin grain.  Taking the grain setting to 100 percent pretty much allows you to paint without grain.  This is a fun way to create a painting and a good way to  experiment with creating a painting without cloning from a photo. Just play and enjoy.


Related Images:

Corel Painter 12.1 – All About Color Sets

http://www.youtube.com/watch?v=k4YtwUSaarY

Use color sets to select a single color or select all the colors in a color set to paint with. Create custom color sets, add new color sets fron Corel Painter Extra Content. Modify a  color set. Add or delete from view color sets.  This video will show you how.

I created a custom color set in order to select colors for this painting.

Related Images:

Corel Painter 12.1 Tutorials – Creating Painter LOOKS

http://www.youtube.com/watch?v=EanORqCYaKo&context=C4feb606ADvjVQa1PpcFNIlyZgKwjGo4YqwuvZJZBjLHixQyG1s9E=

It is easy  to create custom and accessible brush and texture combinations called “LOOKS” in Corel Painter 12.1

I have created a custom “splatter look” with a specific brush and paper

to simulate the look spattered paint in the image below.

I  can now apply this”spatter” effect to any image with just the click of a “look”.

I hope  you enjoy this video, I would love to receive your comments and feedback.

~~~~~

Winifred Whitfield  is a portrait painter, a fine art painter and teaches digital painting using  Corel Painter and Photoshop.

Related Images:

From Photo to Painting

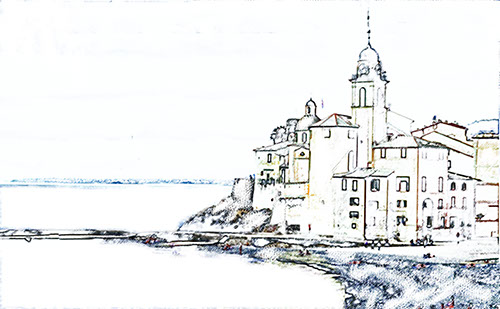
As you know, I  derive great pleasure in taking a photo which appeals to me and making it a painting.  To the extent you can visual the  final Painting – or at least come close, you are all the better for it. Your workflow and process will go more smoothly.  I was fascinated by this architecture. I decided that I wanted to give the image more space so I enlarged the canvas area and extended the sky and water.  From that, I could make a sketch and begin to paint adding and removing elements,  and adjusting colors as the painting evolved.

Original Photo

A Sketch  Can be Made in Painter or Photoshop

Final Painting with Additional Texture Layer Applied


Related Images:

Spring in New York

Spring 2012

I don’t know when New York has had  a winter such as the one past.  There was a freaky heavy snow this past Halloween.  I was in town at that time as well.  I found the beauty but was not inconvenienced by it.  Back again, to experience an early full blown sun lit Spring.  I spend many of my days at the museums. Yesterday I saw the Gertrude Stein collection at the Met.  A couple of days ago, I viewed the Diego Rivera exhibit at MOMA.

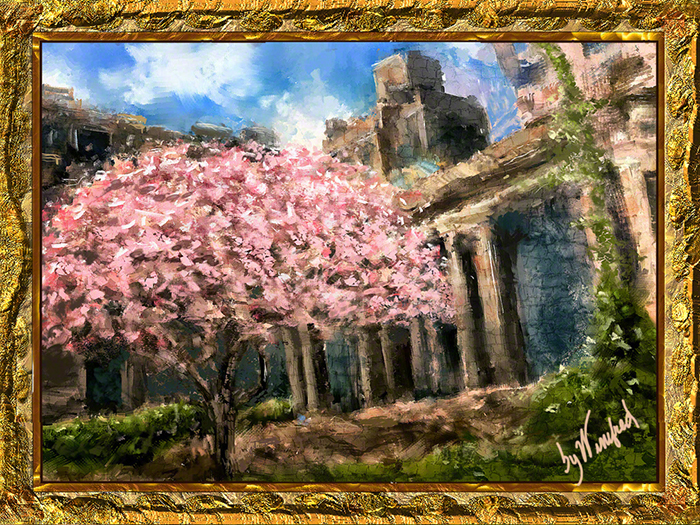
Since recently taking a class in painting street scenes, I must say that I have been looking at the people, traffic and buildings in New York in quite a different way. After leaving the Met a few days ago, I walked wistfully down 5th Ave.  Central Park was across the street from me  to my right and I sought to hug any strip of shade I could find next to the buildings which flanked me to my left. Suddenly I came upon a courtyard with two cherry trees in bloom.  A high fence  beautiful ornamental wrought iron fence shielded the property from the public.  I stuck my iPhone through the , however to snap a couple of images. An interesting perspective, I thought.  This is the resulting painting.  I like it quite a lot.

Related Images:

Corel Painter 12.1 Tutorial – Sampling Multiple Colors

http://www.youtube.com/watch?v=NKFndL2xnmk&context=C4feb606ADvjVQa1PpcFNIlyZgKwjGo4YqwuvZJZBjLHixQyG1s9E=

Sometimes magic occurs in our paintings when we least expect it. I love that

By Winifred

There are times I want to talk about a painting.  Not in this case. This painting tells its own story very well.


Related Images:

Create “Flower Girl” Portraits in Corel Painter or Photoshop

Creating Flower Girls

You have seen my “flower girls” posted in a previous blog. I made this video to show you how to create them. It is quick and easy  – unless you choose to paint them as I did.  But for this video, I chose to do a non painted demo just to show the technique. I think you will find it interesting –  I hope you will enjoy.

http://www.youtube.com/watch?v=q9SrrWT4mi8&context=C3dee137ADOEgsToPDskKjoyY7OK5cl4wSX7FTj7TT

Related Images: